 I absolutely LOVE to use Liquid Glass on my scrapbook projects. For this project, I used the My Stickease Adhesive stickers from my Animal Cookies Level 1 Kit and Animal Cookies Level 2 Paper Pack.
I also used the My Acrylix Childhood stamp set with Desert Sand, Tulip, Clover Meadow, Dutch Blue, and Sunflower Exclusive Inks stamp pads.
To dress up my accents, I used Clear Craft Buttons, Sassy Strands, and Embroidery Floss. I used 3-D Foam Tape, Memory Book Glue Dots, and Liquid Glass for adhesive.
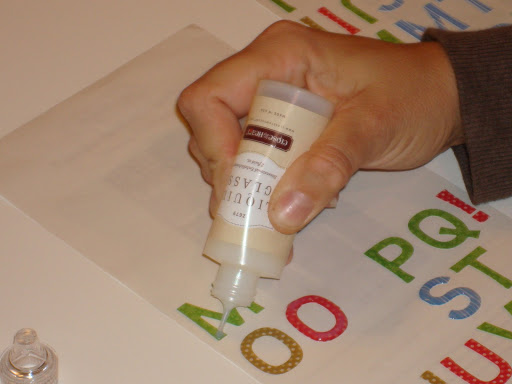
How To Use Liquid Glass on My Stickease Adhesives:

Step 1: Carefully pull the backing from around the desired stickers.
Step 2: Firmly grip your Liquid Glass and thickly coat your sticker. Pierce any air bubbles with the piercing tool, or a needle to remove them from your project.
 Step 3: Wait for your adhesives to dry before applying them to your project. I like to wait a full 24 hours, but the Liquid Glass usually sets up faster. Experiment using glitter, flocking, sparkles, or even applying two coats!
Email me a picture of the projects you complete using Liquid Glass. I’d love to see what creative ideas you have and I’ll post your artwork on my website with your information and give you a goodie bag as a thank you!
